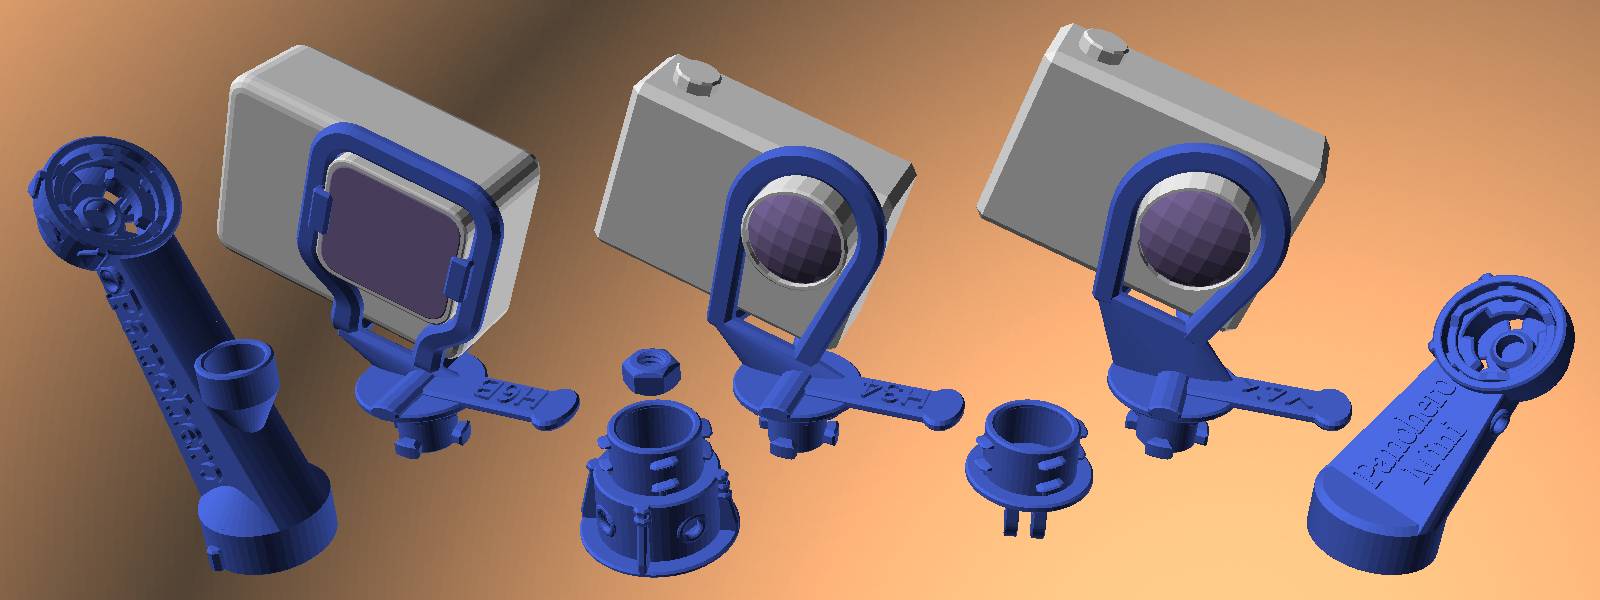
Panohero-Mini-Maxi Product Family
Panohero-Mini-Maxi is a family of panoramic heads for GoPro Hero action cameras – built from a set of compatible parts. Heads are produced on demand by 3D-printing market places like Shapeways. Products are available as sets of connected parts. Individual parts can be acquired too – as replacement parts or for switching to another camera.
Panohero-H9B, Panohero-Mini-H8B and all models of Panohero-Maxi support a customary 7x12mm bubble level.
The least recent model is Panohero-H9B for GoPro Hero 9 Black. This combi generates equirectangular panoramas with a height of 8901 pixels and an overall size of 158 megapixels.
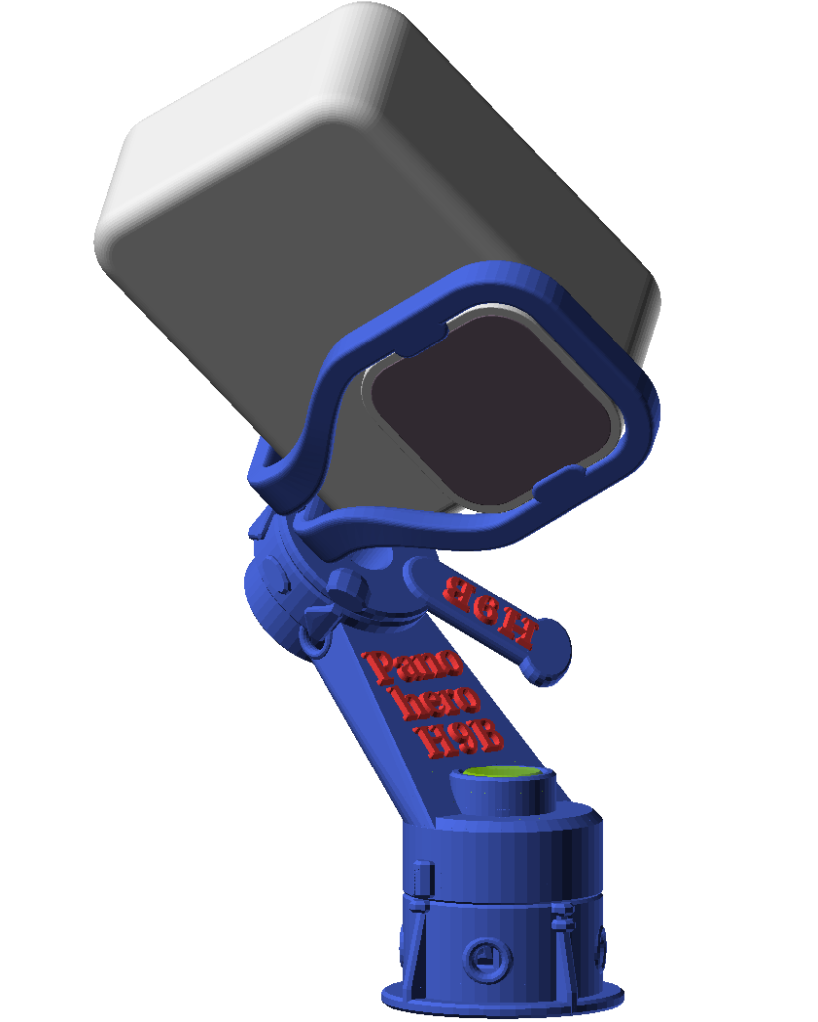
Panohero-H9B
for GoPro Hero 9 Black
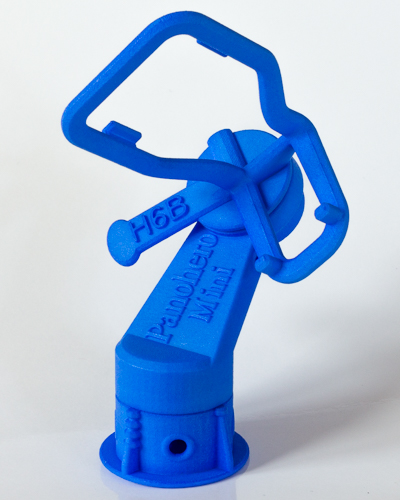
Panohero-Mini-H6B
for GoPro Hero 5/6/7

See Sample Virtual Tours. Download Sample Shots.
Look at virtual tours shot with GoPro Hero 5 and Panohero-H5B –
a predecessor of Panohero-H9B. Download sample shots for your own stitching.

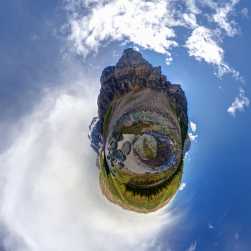
Create perfect 360 panoramas
Capture high quality VR-images with an action camera and a small panoramic head –
what it takes, how it works and what you get from it
(shown at the example of Panohero-Classic-H)
Presentation of Panohero-Mini-Maxi family:
Shipped parts, assembly, usage, products, shooting directions
Panohero-Mini-H6B
American Review of Andrew Wagner
Panohero-Mini-H6B and Panohero-Maxi-H6B
Review of Le Journal Photo
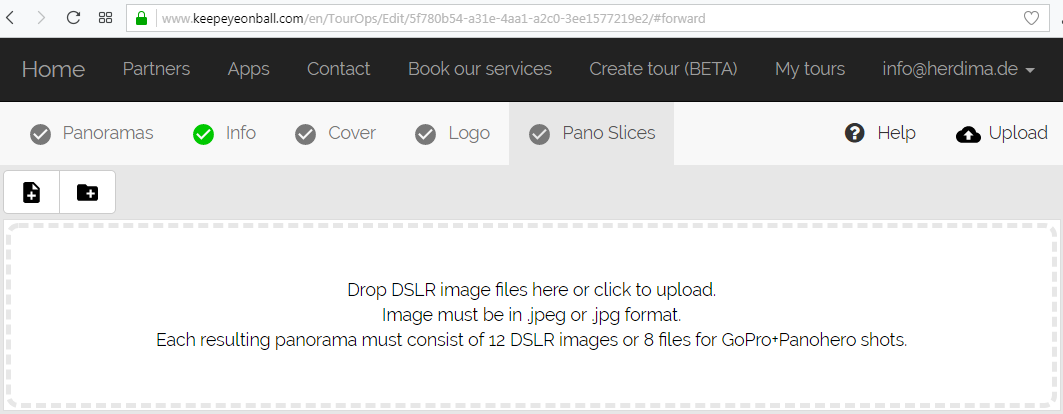
Free Stitching Service
KeepEyeOnBall provides a free stitching service for images shot with Panohero. This service makes the creation of virtual tours for real estate especially easy. 100 virtual tours are automatically free for Panohero users. There is no limit for the number of panoramas per tour. Register, upload your shots, wait for the stitching to complete and link your panoramas to a tour as shown in this video. Learn more from the nice manual – it is sketch-based and text-free.
The above review of Andrew Wagner comprises a test of the free stitching service of KeepEyeOnBall.
User’s Manual for Panohero-Mini-Maxi
A two-page user’s manual of the product family is available in PDF format:
- English
- German / Deutsch
- French / Français (by courtesy of Le Journal Photo)
Technical data of Panohero-Mini-Maxi
Technical Data for the product family Panohero-Mini-Maxi are available in PDF format.
Want a steel nut?
You can easily replace the 3d printed hex nut with a steel nut if you want to. The user’s manual shows how. Get a 1/4″-20 UNC nut from BoltDepot, Fastenal, Teleskop Service, Westerfield Fasteners, Grainger, fotoschraubenshop, astro-shop, augenblicke-eingefangen or others.